No matter how flexible an extension is, there always comes a time where, now that the functionality is in place, the output is not quite an exact match to the original design.
There are many ways to overcome design issues in Joomla, all mostly involving overrides. When the layout is considerably different, a template override may be in order but for simple changes (like the color of a title for instance), additional CSS code may just be the way to go.
Hopefully, the extension you are using is designed well enough so you can easily skin it.
But how can you find out if an element has a class attribute associated to it and how can you use it to change its look?
It turns out you already have the tool you need at your fingertip: your browser.
Let's take an example...
A module instance you have just created has the following output (we use a Latest News Enhanced Pro instance as an example, but the process will be the same for any extension):

In the top left corner, there is a sticker label 'All recipes', which actually represents the category the item is part of. Our design demands for a slight change and we need to find out if the element is skinnable.
Step 1 Inspecting the element.
Most browsers nowadays have developer tools (usually the F12 key triggers the tools on Windows). Don't get scared by the term 'developer'. Although most available tools may look difficult to use if you are not familiar with them, others are very simple to handle.
In our case, the best way to get to the tool we need is as simple as a 'right-click' on the 'All Recipes' label. It triggers a menu where one can find actions associated with the element on the page.
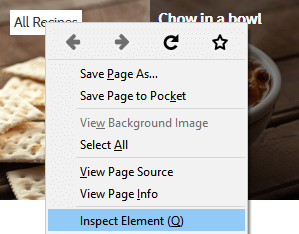
In Firefox, Safari, Opera and Edge, the action 'Inspect Element' is made available. In Chrome, it is just 'Inspect'.
Step 2 Checking the code.
Once the element is in inspection mode, an adjacent window opens (inside the browser or as a new window). The following screenshot shows the developer tools opened in Firefox, with the category label selected:
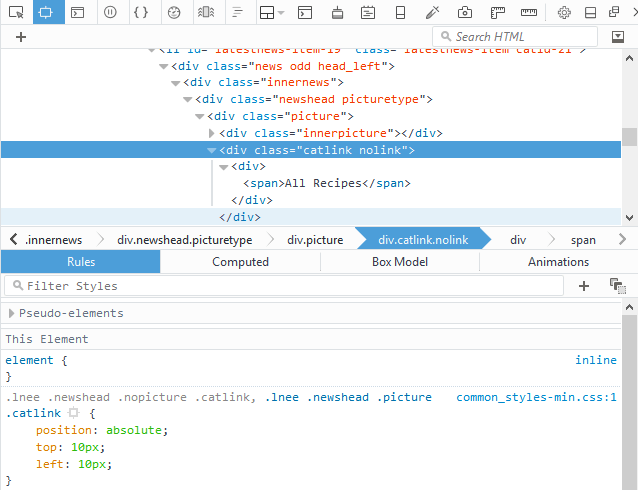
We can now see the structure used to create the label and what CSS rules are applied to it.
In this example, the label has a class named 'catlink'. This is the class we will be using to further skin the label.
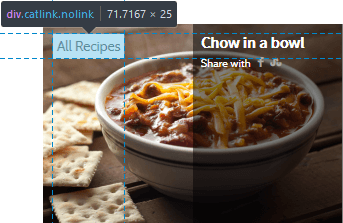
Step 3 Testing additional CSS properties.
Let's say our design calls for a see-through background for the label, a red line on top and uppercased text.
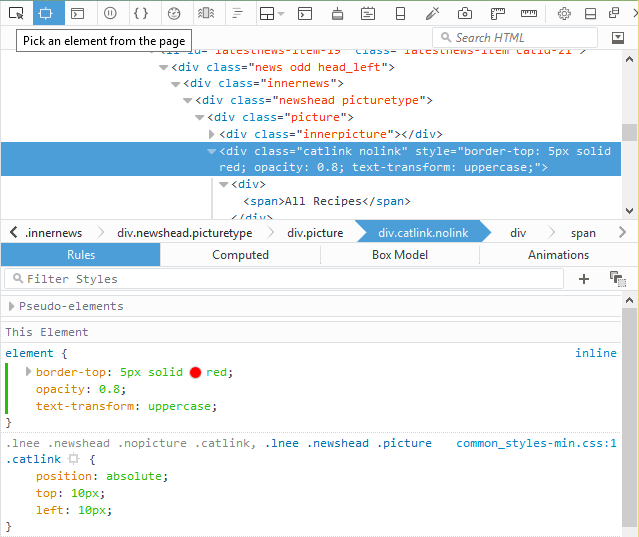
Above the actual .catlink rules, it is possible to manually add new ones into the empty element { } area.
This is very convenient to tweak the look of the output without having to add code on the server and refresh the page at every single change.
In our example, we will enter border, opacity and text-transform properties (for a list of available properties and their values, I would suggest the site w3schools.com).
Step 4 Adding the styles permanently.
Once the CSS tweaks finally give the desired output, it is time to include them into the administrative side of the site for permanent use.
Some extensions have specific areas to enter additional CSS code (all Simplify Your Web extensions do), but when they don't (or when the same CSS code is generic to the extension throughout the site), the best place to enter those new properties is directly inside one of the CSS files of the template used.

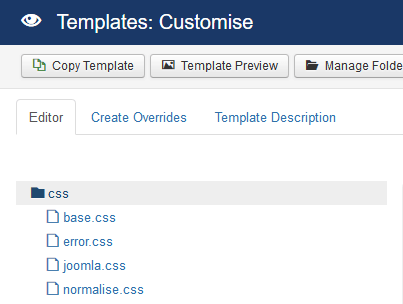
To get to the template's CSS files, go to Extensions -> Templates -> Templates section -> Details and files.
The final output:

Additional notes
Note 1 It is possible to skin an element that has an 'id' attribute. In that case, the rule will start with a '#' character.
For instance, if the html code contains the following:<div id="cat_58" class="catlink">...</div>
then the CSS rule will be of the form#cat_58 { border: ... }
and will be specific to that element on the page (ids are unique), whereas the CSS associated with the class .catlink will be assigned to all elements of the page that have that class name.
Note 2 opacity in IE 6-9 require specific use of filters. For more info, please refer to this article about opacity.
Troubleshooting
Everything looked fine in the testing environment, but once added permanently, it turns out the styles don't get applied.
Other than being a caching issue, it can also be a problem of precedence in the way the styles are applied to the element, especially when overriding existing CSS properties (adding the CSS properties to an element in the browser developer console gives those properties highest priority). In this case, you have to make sure the replacing rule is as 'specific' as the original one.
For instance, if the original rule is:
.news .picture .catlink { ... }
then the replacing one has to be similar (starting with .news ...).
Sometimes, as a last resort, one can apply the !important rule in order to force the CSS property onto the element.
For instance, use :.catlink { border: 5px solid red !important; }
to force the border property no matter what.

