Pro v4.7.2+
The Latest News Enhanced Pro
extension allows you to add your own animations in its module.
Animations are located in modules/mod_latestnewsenhancedextended/animations under Joomla 3.
In Joomla 4, find them in media/mod_latestnewsenhanced/images/animations, media/mod_latestnewsenhanced/scripts/animations and media/mod_latestnewsenhanced/styles/animations.
To create and enable an animation, several steps are required. In this example, we will add the Owl 2 Carousel.
Step 1: Create a unique folder with the name of your animation
The folder name will trigger the appearance of the animation into the module animation selection (Animation/Pagination tab). Here we create the owl folder.

Step 2: Add index.html
As a general rule, add the empty file index.html to prevent the folder's files to be visible to visitors of your site. You can just copy that file from another animation folder.
Step 3: Create the file style.css.php
style.css.php contains the CSS that styles the animation, mostly to ensure the items get the proper styling but also to potentially style the pagination. The file should at least contain the following code:
<?php
// No direct access to this file
defined('_JEXEC') or die();

// Explicitly declare the type of content
header("Content-type: text/css; charset=UTF-8");
?>
For the final version of this file (which takes into account pagination placement for instance), download the package at the end of this article.
Step 4: Create the file owl.js.php
Owl is a jQuery plugin. This is where the plugin is called. The basic code in that file should be:
<?php
defined('_JEXEC') or die;

// Explicitly declare the type of content
header("Content-type: text/javascript; charset=UTF-8");

$warning_message = '';
?>

(function($){
    $(window).load(function() {

        <?php if ($warning_message && $show_errors) : ?>
            $("<?php echo $css_prefix ?>").prepend('<div class="alert alert-warning"><?php echo JText::_($warning_message); ?></div>');
        <?php else : ?>

            <!-- This is where the plugin is called -->

        <?php endif; ?>
    });
})(jQuery);
The warning message can trigger a warning if some specific variable is not set by the user of the animation, if a required variable is missing for instance.
The file owl.js.php can use this set of variables:
$pagination_position |
above|below|around|title | |
$bootstrap_version |
2|3|4 | |
$pagination_style |
[empty]|pagination | pagination specifies that Bootstrap is used |
$pagination_size |
string | the bootstrap size for the Bootstrap version used |
$pagination_align |
string | the bootstrap alignement for the Bootstrap version used |
$items_height |
number | |
$items_width |
number | |
$item_width |
number | |
$item_width_unit |
%|px | |
$min_width |
number | |
$horizontal |
true|false | the layout |
$direction |
left|up|right|down | direction of the animation |
$arrows |
true|false | |
$pages |
true|false | |
$symbols |
true|false | like dots |
$visibleatonce |
number | the number of items to show |
$moveatonce |
number | the number of items to move at once |
$auto |
true|false | |
$speed |
number | |
$interval |
number | |
$restart_on_refresh |
true|false | |
$num_links |
number | number of navigation links to show |
$prev_label |
string | |
$next_label |
string |
Step 5: Add the script code to owl.js.php
Using the available variables and specific parameters of the plugin, connect the plugin to the extension. In our example, we can setup the Owl jQuery plugin as the following:
$('<?php echo $css_prefix; ?> .latestnews-items').addClass('owl-carousel owl-theme');

 var owl = $("<?php echo $css_prefix ?> .owl-carousel");

 owl.owlCarousel({
     items: 1,
     margin: 20,
     nav: false,
     <?php if (!$symbols) : ?>
         dots: false,
     <?php endif; ?>
     loop: true,
     <?php if ($auto) : ?>
         autoplay: true,
         autoplayHoverPause: true,
         autoplayTimeout: <?php echo $interval ?>,
     <?php endif; ?>
     responsive:{
         640:{
             items:2
         },
         1280:{
             items:3
         }
     }
 });
The $css_prefix variable ensures the code stays specific to the instance of the module your are using..latestnews-items is the element the plugin will be applied to.
Find the list of parameters for the Owl plugin at this page.
Step 6 (optional): Add an image for your animation
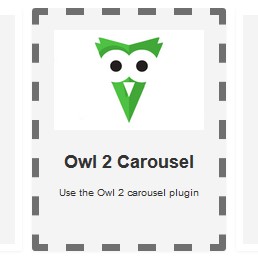
To show an image of the resulting animation in the module, make sure you include a .png file (with a size of 300x200 pixels) with the same name as the folder you have created at step 1.
Following our example, the file would be named owl.png.
Step 7 (optional): Rename your animation
You can change the name of your animation and add a little description by using language overrides. For example, create the administrator keys:
MOD_LATESTNEWSENHANCEDEXTENDED_ANIMATION_OWL_LABEL with value "Owl 2 Carousel"MOD_LATESTNEWSENHANCEDEXTENDED_ANIMATION_OWL_DESC with value "Use the Owl 2 carousel plugin"

Step 8: Call the jQuery plugin necessary scripts and stylesheets
Create the file helper_owl.php in the /helpers folder of the module.
Add the code:
<?php
defined('_JEXEC') or die;

class modLatestNewsEnhancedExtendedHelperOwl
{
    static $libraryLoaded = false;

    static function load_library()
    {
        if (self::$libraryLoaded) {
            return;
        }

        $doc = JFactory::getDocument();

        $doc->addScript('https://cdnjs.cloudflare.com/ajax/libs/OwlCarousel2/2.3.4/owl.carousel.min.js');
        $doc->addStyleSheet('https://cdnjs.cloudflare.com/ajax/libs/OwlCarousel2/2.3.4/assets/owl.carousel.min.css');

        self::$libraryLoaded = true;
    }
}
The static variable $libraryLoaded ensures that those libraries are not loaded multiple times.
Note that you may store those scripts and stylesheets locally if you prefer.
Step 9: Add pagination
Pagination is handled separately to ensure it can be placed at different areas of the module template (below, above items for instance).
Create the file owl.php under the tmpl/pagination folder. Add the code:
<?php
defined( '_JEXEC' ) or die;

$label_prev_output = '<span class="SYWicon-arrow-left2"></span>';
if ($pagination_position == 'up') {
    $label_prev_output = '<span class="SYWicon-arrow-up2"></span>';
}
if ($label_prev) {
    $label_prev_output = '<span>'.$label_prev.'</span>';
}

$label_next_output = '<span class="SYWicon-arrow-right2"></span>';
if ($pagination_position == 'down') {
    $label_next_output = '<span class="SYWicon-arrow-down2"></span>';
}
if ($label_next) {
    $label_next_output = '<span>'.$label_next.'</span>';
}
?>
<?php if ($pagination !== 'p' && $pagination !== 's') : ?>
    <div class="items_pagination<?php echo empty($pagination_position) ? '' : ' '.$pagination_position; ?>">
    <?php if ($pagination_position == '' || $pagination_position == 'top' || $pagination_position == 'bottom') : ?>
        <ul>
            <li><a id="prev_<?php echo $class_suffix; ?>" class="previous" href="#" onclick="return false;"><?php echo $label_prev_output; ?></a></li><!--
            --><li><a id="next_<?php echo $class_suffix; ?>" class="next" href="#" onclick="return false;"><?php echo $label_next_output; ?></a></li>
        </ul>
    <?php endif; ?>
    <?php if ($pagination_position == 'left' || $pagination_position == 'up') : ?>
        <ul>
            <li><a id="prev_<?php echo $class_suffix; ?>" class="previous" href="#" onclick="return false;"><?php echo $label_prev_output; ?></a></li>
        </ul>
    <?php endif; ?>
    <?php if ($pagination_position == 'right' || $pagination_position == 'down') : ?>
        <ul>
            <li><a id="next_<?php echo $class_suffix; ?>" class="next" href="#" onclick="return false;"><?php echo $label_next_output; ?></a></li>
        </ul>
    <?php endif; ?>
    </div>
<?php endif; ?>
The first part of the code handles the fact that we can have a label or just arrows in the pagination. Note that the Owl
plugin does not have pages, only dots and/or previous/next options.
The $pagination variable is the kind of pagination that is requested by the user. It can have the following values:
| p | when the user asks for pages only |
| s | when the user asks for dots only ('s' stands for 'symbols') |
| pn | when the user asks for prev/next |
| ppn | prev/next with pages |
| psn | prev/next with dots |
Check the final code in the package you can download at the end of this article. It has additional statements and modifications that take into account all Bootstrap 'flavors'.
Step 10: Connect the pagination to the jQuery plugin
Now that you have set the code for the pagination, it is important to let the plugin know what to do when pagination elements are clicked.
Add the following code to owl.js.php, after the plugin call:
$("<?php echo $css_prefix; ?> .items_pagination .previous").click(function() {
    owl.trigger('prev.owl.carousel');
});

$("<?php echo $css_prefix; ?> .items_pagination .next").click(function() {
    owl.trigger('next.owl.carousel');
});
That's it! That is all you have to do to enable the Owl 2 Carousel
jQuery plugin. Make sure you download the final version below! (just install as a regular extension, it will install itself and will be ready to use).
LNE Pro v4.7.2+


