
It is assumed that you have already downloaded and installed the extension (free or pro). If not, you can find more information here on how to do so.
There are many options in the extension to give you maximum flexibility in the way you want to design your final output. In this guide, you will be walked through the main parameters that are necessary to create a module instance. You can leave all other parameters to their defaults until you are ready to fine-tune its visual aspect and performance.
Pre-requisites
You need to have created articles (through the core Joomla content extension) or K2 items, if you have installed the K2 extension and desire to use Latest News Enhanced for showing K2 items.
Step 1 - Create a module instance of Latest News Enhanced
Go to the menu Extensions -> Modules.
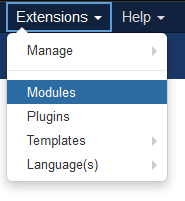
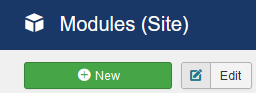
Click on New.
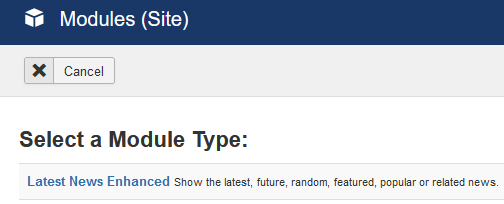
Select the module type Latest News Enhanced.
Step 2 - Set the module's general parameters
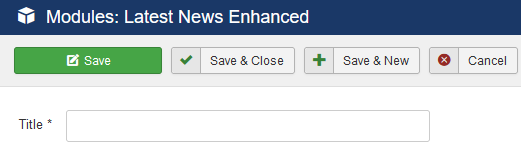
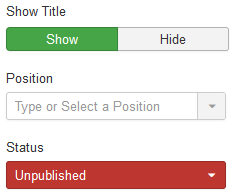
Set the module's title.
Set the template's position and publish the module.
Step 3 - Assign the module to specific areas of the site
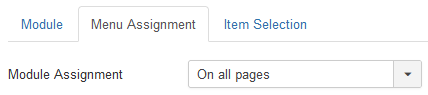
For testing purposes, it is easier to leave the default settings.
Step 4 - Narrow down the list of items you want to show
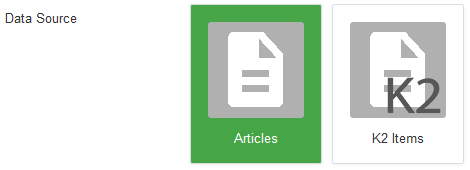
Click on the Item selection tab.

Choose the desired data source.
Select Articles to show articles, select K2 Items to show K2 items, if you are using K2 rather than the Joomla Content component.
Select the category or categories the articles come from.
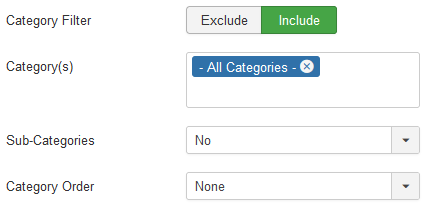
All categories are selected by default, therefore retrieving all existing articles or K2 items. To select a specific category, select it from the list.

Once selected, remove the All Categories option.

Narrow down the number of items that will be listed by the module instance. Set Max Count to a reasonable amount while you are in the testing stage.

Step 5 - Design the overall layout of all items
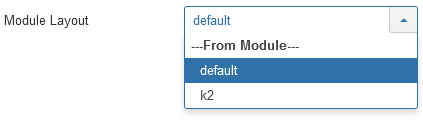
Click on the Layout tab.

Check the module layout related to the data source. Default is the layout used for articles. K2 is the layout used for K2 items.
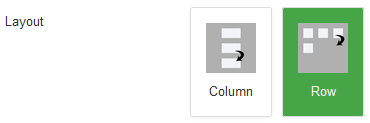
Select the layout the items will follow. Set it to Column (or vertical) to show the items in a single column fashion, set it to Row (or horizontal) to show them in a row fashion.
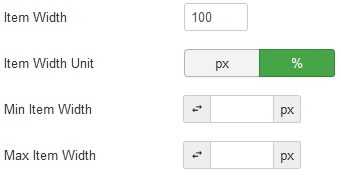
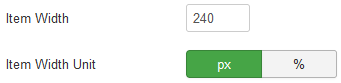
Set the width of the items.
The default settings will set each and every item to take 100% of the container' space, therefore forcing the items to show in a vertical fashion (or have 1 column).
To show 3 items in a row (or have 3 columns), set the percentage width to something like 30%. This will give each item a third of the space allocated by the container to the module instance (plus some space for margins). To limit the downsizing of each item to something visually pleasing and lisible, you can set a minimum width, under which the items will stop resizing down. In a responsive environment, this will have a visual impact. 3 items in a row will resize down until they hit the minimum size. Once that limit is hit, the third item will be forced to show in a second row.
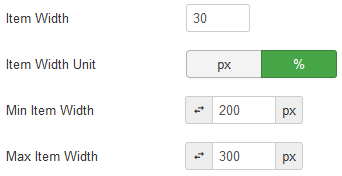
It is possible to force items to be of a specific size. Set the width in pixels in order to do so.
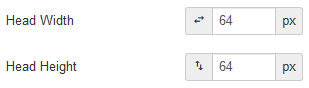
Choose what visual element you want to show for each item. For instance, you may want to add an image found in each article or K2 item.
In the context of the Latest News Enhanced extension, that visual element is called the Head of the item.

Set the width and height of that visual element. In the event you chose the original style, this can be of any size, but a small image will definitely load faster.
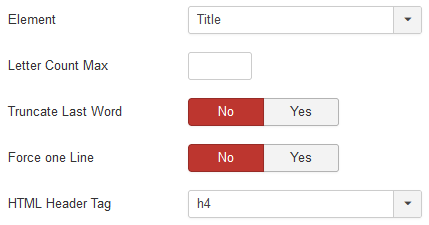
Decide how the title of the article or K2 item will show. It can be restricted to show on one line, no matter how resized the item will be, it can be limited to a fixed amount of letters or show in its full glory on one or several lines.
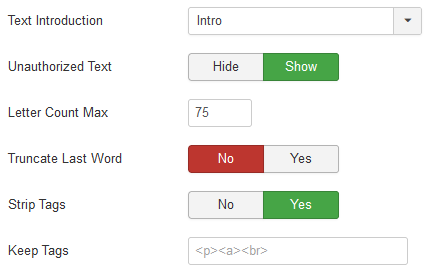
Decide how the text of the article or K2 item will show.
The default font size will dictate the initial font size for the overall design of each item. All text will be resized according to that font size of reference.
Set the position the text should have compared to the visual element (head) that you have added. If no visual element has been selected, just leave the default setting.
Limit the letter count to a reasonable amount that will comply to your design requirements. If you don't restrict the amount of text, you will end up with over-blown items if your articles or K2 items are lengthy.
Stripping the tags will remove all HTML tags included in the text of the articles or K2 items, therefore removing all formatting. It is preferable to leave this setting to Yes in your initial setup.
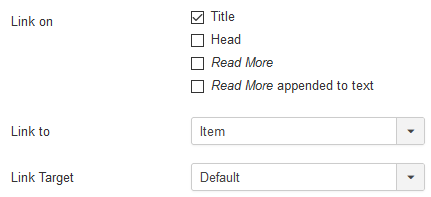
Step 6 - Link the items to the original articles or K2 items
You can add a link that will open the associated article or K2 item. You have several options:
- make the title of the item clickable,
- make the head (or visual element you have selected) clickable - calendar representations are not clickable,
- add a read more link (you need to set the label in the Read More section),
- append a read more link at the end of the text (you need to set the label in the Read More section).
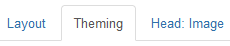
Step 7 - Set the overall style for each item
Click on the Theming tab.
Choose the style that it is closest to what you are looking to achieve.
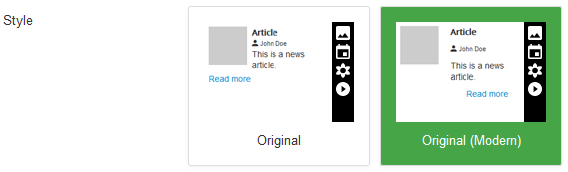
In that section, you can tweak the look of each item and add your own CSS properties.
Step 8 - Setup the visual element (head) that you have added to your design
In our example, we have decided to show an image, if one is found in the content. Therefore, click on the Head: image tab.

Good practice would be to setup the default image that will show if no image has been found in your article or K2 item. It will be particularly useful in the early stages of your setup.

The extension creates thumbnails of the images by default. It is wise to create thumbnails rather than using original, especially if the original images are rather large.

The Crop Pictures option will ensure all your images fit perfectly in the size (head width and head height) you have previously set, resizing and cropping them if necessary.

Step 9 - Add contextual information
You can show relevant information to each item you are showing with the module. For instance, you can show the author of each article or K2 item.
Click on the Information tab.

Click on the '+' icon to add pieces of information before or after the title, before or after the text.

Set information parameters or each piece of information you want to show.
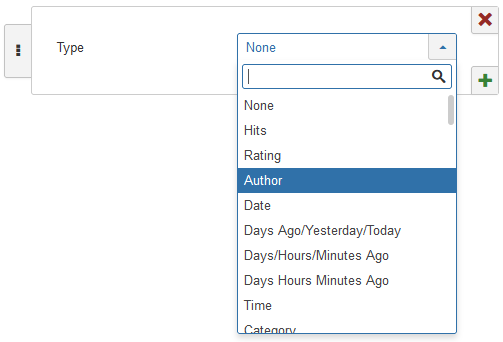
There are plenty of pieces of information you can choose from. Select Author as an example.
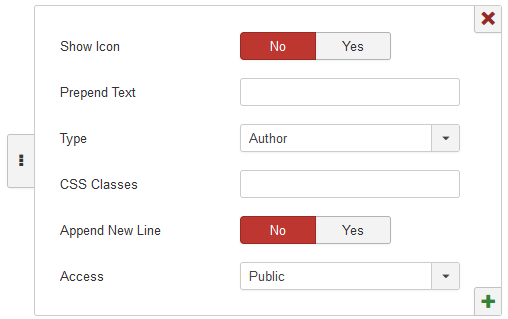
You can show an icon or prepend text to the author. For instance, if you add 'The author is ' (with a space after the 'is') in the Prepend Text field, you will end up with something like:
The author is John Doe
Append New Line will force the following piece of information to show on the next line.
Step 10 - Save the module
That's it! You went through the minimal amount of information you need to know to create your first instance of the Latest News Enhanced module.
Let's see what the module instance looks like on the public site:
-

What's new in Latest News Enhanced Pro v7.4
- Information
There's a lot packed into this new version of Latest News Enhanced Pro,... -

Setup inline items in Latest News Enhanced Pro - Revisited in 7.4
- Information
In certain situations, whenever your requirements ask for each item to... -

Using custom fields to select items in Simplify Your Web extensions
- Information
Simplify Your Web extensions have a very extensive array of options when...


