Pro v4.0+
The Latest News Enhanced Pro
extension allows you to add your own calendar styles.
Calendars are located in media/syw_latestnewsenhanced/calendars under Joomla 3.
In Joomla 4, find them in media/mod_latestnewsenhanced/images/calendars and media/mod_latestnewsenhanced/styles/calendars.
To create a calendar style, follow these simple steps:
Step 1: Create a folder with the name of your calendar
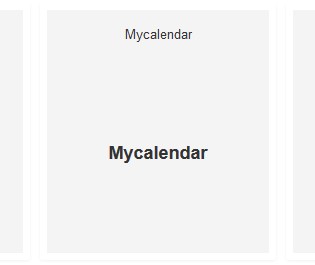
The folder name will trigger the appearance of the calendar into the module or menu item (view) calendar selection (Head: calendar tab).

Step 2: Add index.html
As a general rule, add the empty file index.html to prevent the folder's files to be visible to visitors of your site. You can just copy that file from another calendar folder.
Step 3: Copy style.css.php
style.css.php contains the CSS that styles the calendar. Copy the file from the original calendar folder or from any of the available calendars (choose a calendar that is closest to the look you are looking for creating).
Step 4: Modify style.css.php
The bloc that needs to be styled is built as the following:
<div class="newshead calendartype">
    <div class="calendar [image|noimage]">
        <span class="position1 weekday">Tue</span>
        <span class="position2 day">15</span>
        <span class="position3 month">Jan</span>
        <span class="position4 year">2019</span>
        <span class="position5 time">10:25am</span>
    </div>
</div>
If a background image has been selected, the image class is added. If not, noimage is used instead.
Note that weekday, day, month, year and time can be positioned anywhere and are a result of your selection in the extension.
When selecting 'none', the position X is missing. When using 'empty', the empty class is used and the value is a blank space.
<div class="newshead calendartype">
    <div class="calendar [image|noimage]">
        <span class="position1 weekday">Tue</span>
        <span class="position2 day">15</span>
        <span class="position3 month">Jan</span>
        <span class="position4 empty"> </span>
    </div>
</div>
If the date is missing, the calendar will not show but the following code will be created instead:
<div class="newshead calendartype">
    <div class="nocalendar"></div>
</div>
The file style.css.php is a php
file. As such, you can use available variables in your file. These variables correspond to parameters of the extension, especially the ones found in the styles section in the Head: calendar tab.
$color |
The overall text color |
$bgcolor1 |
The overall background color |
$bgcolor2 |
The 2nd overall background color, used for creating gradients |
$color_top |
The text color originally intended for position 1 |
$bgcolor1_to |
The background color for position 1 |
$bgcolor2_top |
The 2nd background color, for position 1, used for creating gradients |
$color_bottom |
The text color originally intended for position 5 |
$bgcolor1_bottom |
The background color for position 5 |
$bgcolor2_bottom |
The 2nd background color, for position 5, used for creating gradients |
$cal_shadow_width |
The shadow width |
$cal_border_width |
The border width |
$cal_border_radius |
The border radius |
$cal_border_color |
The border color |
$font_ref_cal |
The font size of reference |
Note that the background image and font family are not set in this file, which does not prevent you to add your own defaults.
Finally, as a convention, you should start the CSS properties with:
<?php echo $suffix; ?> .newshead ...The 'wrongly named' suffix variable will differentiate all instances and views of the extension.
Step 5 (optional): Add a calendar image
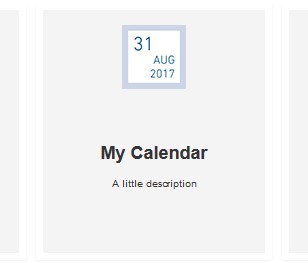
To show an image of the resulting calendar in the module or view selection, make sure you include a .png file (with a size of at most 96x96 pixels) with the same name as the folder you have created at step 1.
Following our example, the file would be named mycalendar.png.
Step 6 (optional): Rename your calendar
You can change the name of your calendar and add a little description by using language overrides. For example:
For the views, we would create the administrator keys:
COM_LATESTNEWSENHANCEDPRO_STYLE_CALENDAR_MYCALENDAR_LABEL with value "My Calendar"COM_LATESTNEWSENHANCEDPRO_STYLE_CALENDAR_MYCALENDAR_DESC with value "A little description"
For the module, we would create the administrator keys:
MOD_LATESTNEWSENHANCEDEXTENDED_STYLE_CALENDAR_MYCALENDAR_LABEL with value "My Calendar"MOD_LATESTNEWSENHANCEDEXTENDED_STYLE_CALENDAR_MYCALENDAR_DESC with value "A little description"


